



### How to Process Sheepskin Naturally at Home
### قدرتی طریقے سے بھیڑ کی کھال کو گھر پر تیار کریں
#### درکار سامان:
- تازہ بھیڑ کی کھال (بالوں سمیت)
- پانی
- صابن
- بغیر آئیوڈین والا نمک
- سرسوں کا تیل
- بیکنگ سوڈا (اختیاری)
- مضبوط فریم یا کھینچنے والی سطح
- کند چھری یا کھرچنے والا آلہ
- نرم برش
- سوئی اور دھاگہ (اگر ضرورت ہو)
#### مرحلہ وار طریقہ:
1. **کھال کی تیاری:**
- تازہ بھیڑ کی کھال کو ٹھنڈے پانی میں اچھی طرح دھو لیں تاکہ خون اور مٹی نکل جائے۔
- اضافی گوشت اور چربی کو احتیاط سے کاٹ کر صاف کریں، دھیان رکھیں کہ بالوں کو نقصان نہ پہنچے۔
2. **کھال پر نمک لگانا:**
- کھال کو صاف سطح پر گوشت والی سائیڈ اوپر کی جانب رکھیں۔
- گوشت والی سائیڈ پر بغیر آئیوڈین والا نمک اچھی طرح سے لگا دیں۔
- اسے 24-48 گھنٹوں کے لیے چھوڑ دیں تاکہ کھال خشک ہو جائے اور محفوظ رہے۔
3. **کھال کو دوبارہ گیلا اور صاف کریں:**
- نمک کو ٹھنڈے پانی سے دھو لیں۔
- کھال کو نیم گرم پانی اور ہلکے صابن کے ساتھ چند گھنٹوں کے لیے بھگو دیں تاکہ مزید صاف ہو جائے۔
- صابن کو مکمل طور پر نکالنے کے لیے اچھی طرح سے دھو لیں، بالوں کے ساتھ نرمی سے برتاؤ کریں۔
4. **اضافی گوشت اور جھلی کو ہٹانا:**
- کھال کو فریم یا مضبوط سطح پر کھینچیں۔
- کند چھری یا کھرچنے والے آلے کی مدد سے باقی گوشت اور جھلی کو احتیاط سے ہٹا دیں، بالوں والی سائیڈ کو نقصان نہ پہنچائیں۔
5. **سرسوں کے تیل سے کھال کی رنگائی:**
- سرسوں کے تیل اور پانی کا محلول تیار کریں (1 حصہ سرسوں کا تیل، 2 حصے پانی)۔ بیکنگ سوڈا شامل کرنا اختیاری ہے۔
- محلول کو ہلکے سے گرم کریں (پکائیں نہیں)۔
- سرسوں کے تیل کے محلول کو گوشت والی سائیڈ پر اچھی طرح لگائیں، بالوں والی سائیڈ سے بچتے ہوئے۔
- اسے چند گھنٹوں کے لیے چھوڑ دیں، پھر یہ عمل دہرائیں۔
6. **نرمی اور کھینچنا:**
- جب کھال تیل کو جذب کر لے، تو اسے نیم گرم پانی سے نرمی سے دھو لیں۔
- کھال کو مسلسل کھینچیں اور موڑیں تاکہ یہ نرم اور لچکدار رہے۔
- اگر کھال زیادہ جلدی خشک ہو رہی ہو تو پانی سے گیلا کریں اور کھینچنے کا عمل جاری رکھیں۔
7. **حتمی خشک کرنا:**
- جب کھال زیادہ تر خشک اور نرم ہو جائے، تو اسے فریم یا سطح پر مکمل خشک ہونے کے لیے کھینچ دیں۔
8. **برش اور اختتامی لمسات:**
- نرم برش کی مدد سے بالوں والی سائیڈ کو صاف اور پھولدار کریں۔
- کھال میں کسی بھی سوراخ یا کٹ کو سوئی اور دھاگے کی مدد سے مرمت کریں۔
#### بطور گائے کی کھال کا متبادل استعمال:
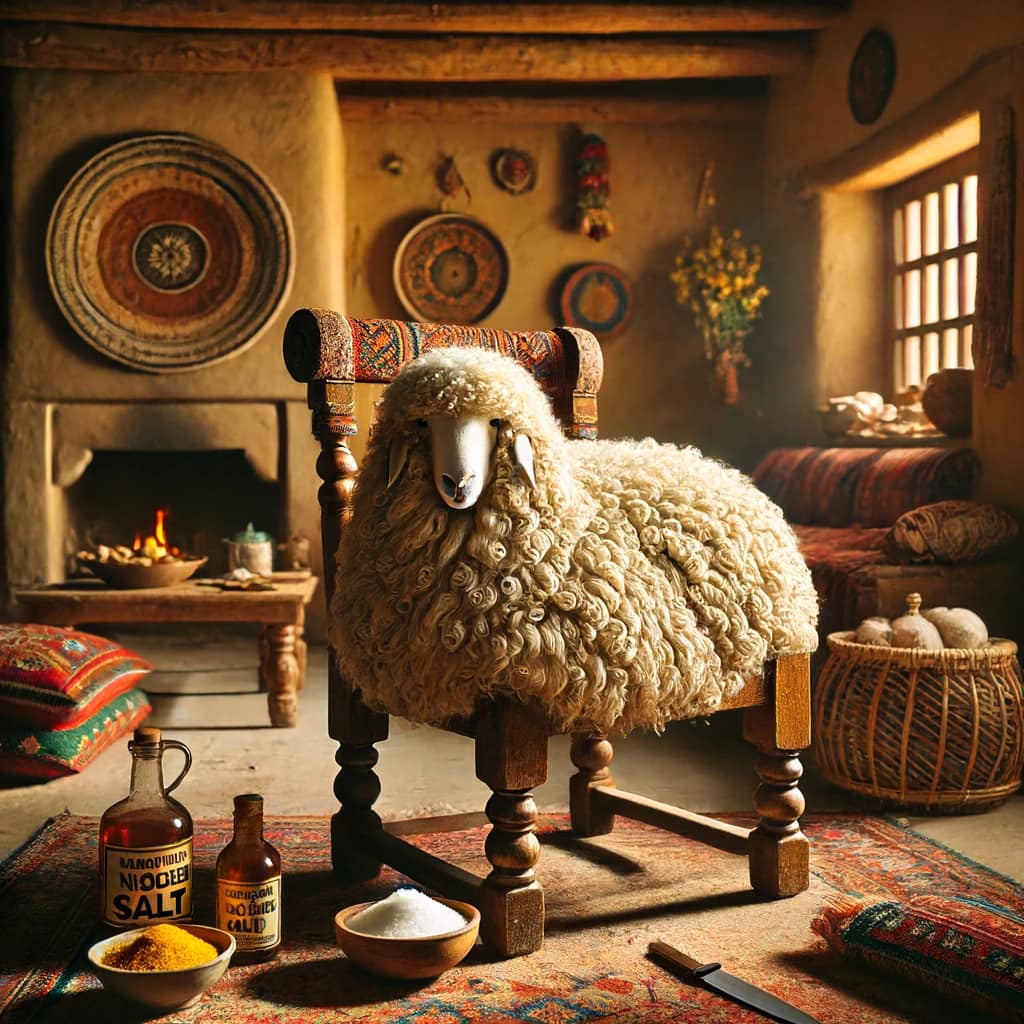
کھال تیار ہونے کے بعد اسے کرسی کے کور کے طور پر استعمال کریں۔ اسے کرسی پر پھیلائیں، یقینی بنائیں کہ یہ برابر ہے اور محفوظ ہے۔
### یہ کیوں کریں:
- **قدرتی خوبصورتی:** محفوظ بال آپ کے گھر میں قدرتی خوبصورتی کا اضافہ کرتے ہیں۔
- **ماحول دوست:** اس طریقے میں کوئی کیمیکل استعمال نہیں ہوتا۔
- **ذاتی توجہ:** ہاتھ سے تیار شدہ اشیاء خصوصی اور منفرد تحائف بنتی ہیں۔
- **پائیداری:** صحیح طریقے سے تیار شدہ کھال نرم، پائیدار اور مختلف استعمالات کے لیے موزوں ہوتی ہے۔
ہم اپنے تمام دوستوں اور پیروکاروں کی حوصلہ افزائی کرتے ہیں کہ وہ اس منصوبے کو آزمایا کریں۔ ایک خوبصورت بھیڑ کی کھال بنائیں، اسے اپنے گھر میں استعمال کریں یا کسی عزیز کو تحفے میں دیں۔ اپنی تخلیقات ہمارے ساتھ شیئر کریں اور قدرتی، ہاتھ سے بنی مصنوعات کی خوشی کو پھیلائیں!
#DIY #NaturalTanning #Sheepskin #EcoFriendly #HandmadeGifts #Crafting
### Transform Sheepskin into a Beautiful, Natural Hide at Home
Have you ever wondered how to transform a fresh sheepskin into a beautiful, natural hide without using chemicals? Here’s a simple and effective way to process sheepskin at home, preserving its natural wool. This DIY project is perfect for anyone who loves natural products and enjoys crafting unique gifts.
#### Materials Needed:
- Fresh sheepskin with hair
- Water
- Soap
- Non-iodized salt
- Mustard oil
- Baking soda (optional, for emulsifying)
- Sturdy frame or stretching surface
- Scraper or dull knife
- Soft brush
- Needle and thread (for repairs if needed)
#### Step-by-Step Guide:
1. **Prepare the Skin:**
- Rinse the fresh sheepskin thoroughly in cold water to remove blood and dirt.
- Trim away any excess flesh and fat from the skin using a dull knife, being careful not to damage the wool.
2. **Salt the Skin:**
- Spread the skin flat on a clean surface with the flesh side up.
- Generously cover the flesh side with non-iodized salt.
- Let it sit for 24-48 hours to dehydrate and preserve the skin.
3. **Rehydrate and Clean:**
- Rinse off the salt with cold water.
- Soak the skin in a large container of lukewarm water with a mild soap for a few hours to clean it further.
- Rinse thoroughly to remove all soap residues, being gentle with the wool.
4. **Remove Excess Flesh and Membrane:**
- Stretch the skin on a frame or a sturdy surface.
- Use a scraper or dull knife to carefully remove any remaining flesh and membrane from the flesh side, taking care not to damage the wool side.
5. **Oil Tanning with Mustard Oil:**
- Mix a solution of 1 part mustard oil to 2 parts water. Adding a small amount of baking soda can help emulsify the mixture, but its optional.
- Warm the solution gently (do not cook it).
- Rub the mustard oil solution thoroughly into the flesh side of the skin, avoiding the wool side as much as possible.
- Let it sit for several hours, then repeat the process.
6. **Softening and Stretching:**
- After the skin has absorbed the mustard oil solution, rinse it gently with lukewarm water.
- Stretch and work the skin continuously as it dries to keep it soft and pliable. This can be done by pulling, twisting, and wringing the skin.
- If the skin starts to dry too quickly, dampen it with water and continue stretching.
7. **Final Drying:**
- Once the skin is soft and mostly dry, stretch it out on a frame or a flat surface to dry completely.
8. **Brushing and Finishing:**
- Use a soft brush to clean and fluff up the wool side of the sheepskin, keeping it looking beautiful.
- Inspect the skin for any holes or tears and repair them with a needle and thread if necessary.
#### Using as a Cow Hide Substitute:
Once the sheepskin is processed with the hair intact, it can be used as a cowhide substitute for chair covers. Simply drape it over the chair, ensuring its evenly spread and secured if needed.
### Why You Should Try This:
- **Natural Beauty:** The preserved wool adds a touch of natural elegance to any home.
- **Eco-Friendly:** No chemicals are used in this process.
- **Personal Touch:** Handcrafted items make thoughtful and unique gifts.
- **Durability:** Properly tanned sheepskin is soft, durable, and versatile.
We encourage all our friends and followers who enjoy DIY projects to try this out. Make a beautiful sheepskin hide to use in your home or to gift to a loved one. Share your creations with us and spread the joy of natural, handmade products!
#DIY #NaturalTanning #Sheepskin #EcoFriendly #HandmadeGifts #Crafting
---
Feel free to copy, paste, and share this post on your Facebook page!
---
اس پوسٹ کو اپنے فیس بک پیج پر کاپی، پیسٹ اور شیئر کریں!
### قدرتی طریقے سے بھیڑ کی کھال کو گھر پر تیار کریں
#### درکار سامان:
- تازہ بھیڑ کی کھال (بالوں سمیت)
- پانی
- صابن
- بغیر آئیوڈین والا نمک
- سرسوں کا تیل
- بیکنگ سوڈا (اختیاری)
- مضبوط فریم یا کھینچنے والی سطح
- کند چھری یا کھرچنے والا آلہ
- نرم برش
- سوئی اور دھاگہ (اگر ضرورت ہو)
#### مرحلہ وار طریقہ:
1. **کھال کی تیاری:**
- تازہ بھیڑ کی کھال کو ٹھنڈے پانی میں اچھی طرح دھو لیں تاکہ خون اور مٹی نکل جائے۔
- اضافی گوشت اور چربی کو احتیاط سے کاٹ کر صاف کریں، دھیان رکھیں کہ بالوں کو نقصان نہ پہنچے۔
2. **کھال پر نمک لگانا:**
- کھال کو صاف سطح پر گوشت والی سائیڈ اوپر کی جانب رکھیں۔
- گوشت والی سائیڈ پر بغیر آئیوڈین والا نمک اچھی طرح سے لگا دیں۔
- اسے 24-48 گھنٹوں کے لیے چھوڑ دیں تاکہ کھال خشک ہو جائے اور محفوظ رہے۔
3. **کھال کو دوبارہ گیلا اور صاف کریں:**
- نمک کو ٹھنڈے پانی سے دھو لیں۔
- کھال کو نیم گرم پانی اور ہلکے صابن کے ساتھ چند گھنٹوں کے لیے بھگو دیں تاکہ مزید صاف ہو جائے۔
- صابن کو مکمل طور پر نکالنے کے لیے اچھی طرح سے دھو لیں، بالوں کے ساتھ نرمی سے برتاؤ کریں۔
4. **اضافی گوشت اور جھلی کو ہٹانا:**
- کھال کو فریم یا مضبوط سطح پر کھینچیں۔
- کند چھری یا کھرچنے والے آلے کی مدد سے باقی گوشت اور جھلی کو احتیاط سے ہٹا دیں، بالوں والی سائیڈ کو نقصان نہ پہنچائیں۔
5. **سرسوں کے تیل سے کھال کی رنگائی:**
- سرسوں کے تیل اور پانی کا محلول تیار کریں (1 حصہ سرسوں کا تیل، 2 حصے پانی)۔ بیکنگ سوڈا شامل کرنا اختیاری ہے۔
- محلول کو ہلکے سے گرم کریں (پکائیں نہیں)۔
- سرسوں کے تیل کے محلول کو گوشت والی سائیڈ پر اچھی طرح لگائیں، بالوں والی سائیڈ سے بچتے ہوئے۔
- اسے چند گھنٹوں کے لیے چھوڑ دیں، پھر یہ عمل دہرائیں۔
6. **نرمی اور کھینچنا:**
- جب کھال تیل کو جذب کر لے، تو اسے نیم گرم پانی سے نرمی سے دھو لیں۔
- کھال کو مسلسل کھینچیں اور موڑیں تاکہ یہ نرم اور لچکدار رہے۔
- اگر کھال زیادہ جلدی خشک ہو رہی ہو تو پانی سے گیلا کریں اور کھینچنے کا عمل جاری رکھیں۔
7. **حتمی خشک کرنا:**
- جب کھال زیادہ تر خشک اور نرم ہو جائے، تو اسے فریم یا سطح پر مکمل خشک ہونے کے لیے کھینچ دیں۔
8. **برش اور اختتامی لمسات:**
- نرم برش کی مدد سے بالوں والی سائیڈ کو صاف اور پھولدار کریں۔
- کھال میں کسی بھی سوراخ یا کٹ کو سوئی اور دھاگے کی مدد سے مرمت کریں۔
#### بطور گائے کی کھال کا متبادل استعمال:
کھال تیار ہونے کے بعد اسے کرسی کے کور کے طور پر استعمال کریں۔ اسے کرسی پر پھیلائیں، یقینی بنائیں کہ یہ برابر ہے اور محفوظ ہے۔
### یہ کیوں کریں:
- **قدرتی خوبصورتی:** محفوظ بال آپ کے گھر میں قدرتی خوبصورتی کا اضافہ کرتے ہیں۔
- **ماحول دوست:** اس طریقے میں کوئی کیمیکل استعمال نہیں ہوتا۔
- **ذاتی توجہ:** ہاتھ سے تیار شدہ اشیاء خصوصی اور منفرد تحائف بنتی ہیں۔
- **پائیداری:** صحیح طریقے سے تیار شدہ کھال نرم، پائیدار اور مختلف استعمالات کے لیے موزوں ہوتی ہے۔
ہم اپنے تمام دوستوں اور پیروکاروں کی حوصلہ افزائی کرتے ہیں کہ وہ اس منصوبے کو آزمایا کریں۔ ایک خوبصورت بھیڑ کی کھال بنائیں، اسے اپنے گھر میں استعمال کریں یا کسی عزیز کو تحفے میں دیں۔ اپنی تخلیقات ہمارے ساتھ شیئر کریں اور قدرتی، ہاتھ سے بنی مصنوعات کی خوشی کو پھیلائیں!
#DIY #NaturalTanning #Sheepskin #EcoFriendly #HandmadeGifts #Crafting
### Transform Sheepskin into a Beautiful, Natural Hide at Home
Have you ever wondered how to transform a fresh sheepskin into a beautiful, natural hide without using chemicals? Here’s a simple and effective way to process sheepskin at home, preserving its natural wool. This DIY project is perfect for anyone who loves natural products and enjoys crafting unique gifts.
#### Materials Needed:
- Fresh sheepskin with hair
- Water
- Soap
- Non-iodized salt
- Mustard oil
- Baking soda (optional, for emulsifying)
- Sturdy frame or stretching surface
- Scraper or dull knife
- Soft brush
- Needle and thread (for repairs if needed)
#### Step-by-Step Guide:
1. **Prepare the Skin:**
- Rinse the fresh sheepskin thoroughly in cold water to remove blood and dirt.
- Trim away any excess flesh and fat from the skin using a dull knife, being careful not to damage the wool.
2. **Salt the Skin:**
- Spread the skin flat on a clean surface with the flesh side up.
- Generously cover the flesh side with non-iodized salt.
- Let it sit for 24-48 hours to dehydrate and preserve the skin.
3. **Rehydrate and Clean:**
- Rinse off the salt with cold water.
- Soak the skin in a large container of lukewarm water with a mild soap for a few hours to clean it further.
- Rinse thoroughly to remove all soap residues, being gentle with the wool.
4. **Remove Excess Flesh and Membrane:**
- Stretch the skin on a frame or a sturdy surface.
- Use a scraper or dull knife to carefully remove any remaining flesh and membrane from the flesh side, taking care not to damage the wool side.
5. **Oil Tanning with Mustard Oil:**
- Mix a solution of 1 part mustard oil to 2 parts water. Adding a small amount of baking soda can help emulsify the mixture, but its optional.
- Warm the solution gently (do not cook it).
- Rub the mustard oil solution thoroughly into the flesh side of the skin, avoiding the wool side as much as possible.
- Let it sit for several hours, then repeat the process.
6. **Softening and Stretching:**
- After the skin has absorbed the mustard oil solution, rinse it gently with lukewarm water.
- Stretch and work the skin continuously as it dries to keep it soft and pliable. This can be done by pulling, twisting, and wringing the skin.
- If the skin starts to dry too quickly, dampen it with water and continue stretching.
7. **Final Drying:**
- Once the skin is soft and mostly dry, stretch it out on a frame or a flat surface to dry completely.
8. **Brushing and Finishing:**
- Use a soft brush to clean and fluff up the wool side of the sheepskin, keeping it looking beautiful.
- Inspect the skin for any holes or tears and repair them with a needle and thread if necessary.
#### Using as a Cow Hide Substitute:
Once the sheepskin is processed with the hair intact, it can be used as a cowhide substitute for chair covers. Simply drape it over the chair, ensuring its evenly spread and secured if needed.
### Why You Should Try This:
- **Natural Beauty:** The preserved wool adds a touch of natural elegance to any home.
- **Eco-Friendly:** No chemicals are used in this process.
- **Personal Touch:** Handcrafted items make thoughtful and unique gifts.
- **Durability:** Properly tanned sheepskin is soft, durable, and versatile.
We encourage all our friends and followers who enjoy DIY projects to try this out. Make a beautiful sheepskin hide to use in your home or to gift to a loved one. Share your creations with us and spread the joy of natural, handmade products!
#DIY #NaturalTanning #Sheepskin #EcoFriendly #HandmadeGifts #Crafting
---
Feel free to copy, paste, and share this post on your Facebook page!
---
اس پوسٹ کو اپنے فیس بک پیج پر کاپی، پیسٹ اور شیئر کریں!
### How to Process Sheepskin Naturally at Home
### قدرتی طریقے سے بھیڑ کی کھال کو گھر پر تیار کریں
#### درکار سامان:
- تازہ بھیڑ کی کھال (بالوں سمیت)
- پانی
- صابن
- بغیر آئیوڈین والا نمک
- سرسوں کا تیل
- بیکنگ سوڈا (اختیاری)
- مضبوط فریم یا کھینچنے والی سطح
- کند چھری یا کھرچنے والا آلہ
- نرم برش
- سوئی اور دھاگہ (اگر ضرورت ہو)
#### مرحلہ وار طریقہ:
1. **کھال کی تیاری:**
- تازہ بھیڑ کی کھال کو ٹھنڈے پانی میں اچھی طرح دھو لیں تاکہ خون اور مٹی نکل جائے۔
- اضافی گوشت اور چربی کو احتیاط سے کاٹ کر صاف کریں، دھیان رکھیں کہ بالوں کو نقصان نہ پہنچے۔
2. **کھال پر نمک لگانا:**
- کھال کو صاف سطح پر گوشت والی سائیڈ اوپر کی جانب رکھیں۔
- گوشت والی سائیڈ پر بغیر آئیوڈین والا نمک اچھی طرح سے لگا دیں۔
- اسے 24-48 گھنٹوں کے لیے چھوڑ دیں تاکہ کھال خشک ہو جائے اور محفوظ رہے۔
3. **کھال کو دوبارہ گیلا اور صاف کریں:**
- نمک کو ٹھنڈے پانی سے دھو لیں۔
- کھال کو نیم گرم پانی اور ہلکے صابن کے ساتھ چند گھنٹوں کے لیے بھگو دیں تاکہ مزید صاف ہو جائے۔
- صابن کو مکمل طور پر نکالنے کے لیے اچھی طرح سے دھو لیں، بالوں کے ساتھ نرمی سے برتاؤ کریں۔
4. **اضافی گوشت اور جھلی کو ہٹانا:**
- کھال کو فریم یا مضبوط سطح پر کھینچیں۔
- کند چھری یا کھرچنے والے آلے کی مدد سے باقی گوشت اور جھلی کو احتیاط سے ہٹا دیں، بالوں والی سائیڈ کو نقصان نہ پہنچائیں۔
5. **سرسوں کے تیل سے کھال کی رنگائی:**
- سرسوں کے تیل اور پانی کا محلول تیار کریں (1 حصہ سرسوں کا تیل، 2 حصے پانی)۔ بیکنگ سوڈا شامل کرنا اختیاری ہے۔
- محلول کو ہلکے سے گرم کریں (پکائیں نہیں)۔
- سرسوں کے تیل کے محلول کو گوشت والی سائیڈ پر اچھی طرح لگائیں، بالوں والی سائیڈ سے بچتے ہوئے۔
- اسے چند گھنٹوں کے لیے چھوڑ دیں، پھر یہ عمل دہرائیں۔
6. **نرمی اور کھینچنا:**
- جب کھال تیل کو جذب کر لے، تو اسے نیم گرم پانی سے نرمی سے دھو لیں۔
- کھال کو مسلسل کھینچیں اور موڑیں تاکہ یہ نرم اور لچکدار رہے۔
- اگر کھال زیادہ جلدی خشک ہو رہی ہو تو پانی سے گیلا کریں اور کھینچنے کا عمل جاری رکھیں۔
7. **حتمی خشک کرنا:**
- جب کھال زیادہ تر خشک اور نرم ہو جائے، تو اسے فریم یا سطح پر مکمل خشک ہونے کے لیے کھینچ دیں۔
8. **برش اور اختتامی لمسات:**
- نرم برش کی مدد سے بالوں والی سائیڈ کو صاف اور پھولدار کریں۔
- کھال میں کسی بھی سوراخ یا کٹ کو سوئی اور دھاگے کی مدد سے مرمت کریں۔
#### بطور گائے کی کھال کا متبادل استعمال:
کھال تیار ہونے کے بعد اسے کرسی کے کور کے طور پر استعمال کریں۔ اسے کرسی پر پھیلائیں، یقینی بنائیں کہ یہ برابر ہے اور محفوظ ہے۔
### یہ کیوں کریں:
- **قدرتی خوبصورتی:** محفوظ بال آپ کے گھر میں قدرتی خوبصورتی کا اضافہ کرتے ہیں۔
- **ماحول دوست:** اس طریقے میں کوئی کیمیکل استعمال نہیں ہوتا۔
- **ذاتی توجہ:** ہاتھ سے تیار شدہ اشیاء خصوصی اور منفرد تحائف بنتی ہیں۔
- **پائیداری:** صحیح طریقے سے تیار شدہ کھال نرم، پائیدار اور مختلف استعمالات کے لیے موزوں ہوتی ہے۔
ہم اپنے تمام دوستوں اور پیروکاروں کی حوصلہ افزائی کرتے ہیں کہ وہ اس منصوبے کو آزمایا کریں۔ ایک خوبصورت بھیڑ کی کھال بنائیں، اسے اپنے گھر میں استعمال کریں یا کسی عزیز کو تحفے میں دیں۔ اپنی تخلیقات ہمارے ساتھ شیئر کریں اور قدرتی، ہاتھ سے بنی مصنوعات کی خوشی کو پھیلائیں!
#DIY #NaturalTanning #Sheepskin #EcoFriendly #HandmadeGifts #Crafting
### Transform Sheepskin into a Beautiful, Natural Hide at Home
Have you ever wondered how to transform a fresh sheepskin into a beautiful, natural hide without using chemicals? Here’s a simple and effective way to process sheepskin at home, preserving its natural wool. This DIY project is perfect for anyone who loves natural products and enjoys crafting unique gifts.
#### Materials Needed:
- Fresh sheepskin with hair
- Water
- Soap
- Non-iodized salt
- Mustard oil
- Baking soda (optional, for emulsifying)
- Sturdy frame or stretching surface
- Scraper or dull knife
- Soft brush
- Needle and thread (for repairs if needed)
#### Step-by-Step Guide:
1. **Prepare the Skin:**
- Rinse the fresh sheepskin thoroughly in cold water to remove blood and dirt.
- Trim away any excess flesh and fat from the skin using a dull knife, being careful not to damage the wool.
2. **Salt the Skin:**
- Spread the skin flat on a clean surface with the flesh side up.
- Generously cover the flesh side with non-iodized salt.
- Let it sit for 24-48 hours to dehydrate and preserve the skin.
3. **Rehydrate and Clean:**
- Rinse off the salt with cold water.
- Soak the skin in a large container of lukewarm water with a mild soap for a few hours to clean it further.
- Rinse thoroughly to remove all soap residues, being gentle with the wool.
4. **Remove Excess Flesh and Membrane:**
- Stretch the skin on a frame or a sturdy surface.
- Use a scraper or dull knife to carefully remove any remaining flesh and membrane from the flesh side, taking care not to damage the wool side.
5. **Oil Tanning with Mustard Oil:**
- Mix a solution of 1 part mustard oil to 2 parts water. Adding a small amount of baking soda can help emulsify the mixture, but it's optional.
- Warm the solution gently (do not cook it).
- Rub the mustard oil solution thoroughly into the flesh side of the skin, avoiding the wool side as much as possible.
- Let it sit for several hours, then repeat the process.
6. **Softening and Stretching:**
- After the skin has absorbed the mustard oil solution, rinse it gently with lukewarm water.
- Stretch and work the skin continuously as it dries to keep it soft and pliable. This can be done by pulling, twisting, and wringing the skin.
- If the skin starts to dry too quickly, dampen it with water and continue stretching.
7. **Final Drying:**
- Once the skin is soft and mostly dry, stretch it out on a frame or a flat surface to dry completely.
8. **Brushing and Finishing:**
- Use a soft brush to clean and fluff up the wool side of the sheepskin, keeping it looking beautiful.
- Inspect the skin for any holes or tears and repair them with a needle and thread if necessary.
#### Using as a Cow Hide Substitute:
Once the sheepskin is processed with the hair intact, it can be used as a cowhide substitute for chair covers. Simply drape it over the chair, ensuring it's evenly spread and secured if needed.
### Why You Should Try This:
- **Natural Beauty:** The preserved wool adds a touch of natural elegance to any home.
- **Eco-Friendly:** No chemicals are used in this process.
- **Personal Touch:** Handcrafted items make thoughtful and unique gifts.
- **Durability:** Properly tanned sheepskin is soft, durable, and versatile.
We encourage all our friends and followers who enjoy DIY projects to try this out. Make a beautiful sheepskin hide to use in your home or to gift to a loved one. Share your creations with us and spread the joy of natural, handmade products!
#DIY #NaturalTanning #Sheepskin #EcoFriendly #HandmadeGifts #Crafting
---
Feel free to copy, paste, and share this post on your Facebook page!
---
اس پوسٹ کو اپنے فیس بک پیج پر کاپی، پیسٹ اور شیئر کریں!
0 Comments
0 Shares
2704 Views