• #rsisb Roll NO.240 Interview No.11 Foundation Level # 🎙️ Interview: Classmate / Facilitator / Family Member **Assalamu Alaikum everyone!** My name is **Ahmad**, and welcome to another interesting interview session. In this episode, I had the opportunity to interview **Obaid Sajid **, who shared his thoughts and experiences on the topic **"Good Morning – The Tradition Behind the Greeting."** During our discussion, we explored the importance of greeting others with a simple "Good Morning," its history, cultural significance, and how it helps create a positive and respectful environment. Hashir explained how this everyday greeting strengthens relationships, improves communication, and spreads kindness in our homes, schools, and workplaces. This interview highlights the value of good manners, respect, and positive communication. It reminds us that even a few kind words at the beginning of the day can make a meaningful difference in someone's life. We hope you enjoy this conversation and learn something valuable from it. If you found this interview helpful, please **Like 👍, Share 📤, Comment 💬, and Subscribe 🔔** for more educational interviews and inspiring discussions. **🎤 Host:** Ahmad Ali **🎙️ Interviewee:** Obaid Sajid (Classmate/Facilitator/Family Member) **Thank you for watching, and have a wonderful day!** 🌞 **📌 Hashtags:** #Interview #Classmate #Facilitator #FamilyMember #Ahmad #Hashir #GoodMorning #Communication #GoodManners #Education #Learning #PositiveVibes #Respect #Podcast #StreamYard #Sesame #StudentLife Rehan School Islamabad Campus Asma Shaheen EducationWali Irum Asim Saima Happinesswali https://www.facebook.com/share/v/19ALfLTa6F/
    WWW.FACEBOOK.COM
    Facebook
    #rsisb Roll NO.240 Interview No.11 Foundation Level # 🎙️ Interview: Classmate / Facilitator / Family Member **Assalamu Alaikum everyone!** My name is **Ahmad**, and welcome to another interesting...
    0 Commentaires 0 Parts 192 Vue
  • #rsisb
    Roll No.240
    How to Download and Use Sesame
    Foundation level

    Here's a professional description you can use for your post:

    Successfully learned how to download and use Sesame!

    Sesame is a powerful platform that helps users connect, learn, and grow through innovative tools and opportunities. Today, I explored the process of downloading, setting up, and using Sesame to make the most of its features.

    Every new platform is a chance to learn something valuable and improve digital skills. Excited to continue exploring and discovering new opportunities with Sesame!

    #Sesame #DigitalSkills #LearningJourney #OnlineLearning #TechSkills #PersonalGrowth #Innovation #Productivity #Technology #SuccessMindset #ExploreAndLearn

    Rehan School Islamabad Campus
    Asma Shaheen EducationWali
    Irum Asim
    Saima Happinesswali
    #rsisb Roll No.240 How to Download and Use Sesame Foundation level Here's a professional description you can use for your post: 📱✨ Successfully learned how to download and use Sesame! 🚀 Sesame is a powerful platform that helps users connect, learn, and grow through innovative tools and opportunities. Today, I explored the process of downloading, setting up, and using Sesame to make the most of its features. 🌟 Every new platform is a chance to learn something valuable and improve digital skills. 💡📚 Excited to continue exploring and discovering new opportunities with Sesame! 🔥 #Sesame #DigitalSkills #LearningJourney #OnlineLearning #TechSkills #PersonalGrowth #Innovation #Productivity #Technology #SuccessMindset #ExploreAndLearn 🚀📱✨💻🌟📚 Rehan School Islamabad Campus Asma Shaheen EducationWali Irum Asim Saima Happinesswali
    0 Commentaires 0 Parts 140 Vue
  • #rsisb
    Roll NO.247
    Foundation Level

    # How to Download and Use Sesame – A Complete Beginner's Guide

    Are you looking for a simple way to get started with **Sesame**? Whether you're exploring it for learning, productivity, or AI-powered conversations, this guide will help you understand the basics of downloading, setting up, and using Sesame with ease.

    **Step 1: Download Sesame**
    Visit the official Sesame website or your device's app store. Make sure you download the official version to ensure security and access to the latest features.

    **Step 2: Install the App**
    After downloading, open the installer or app and follow the on-screen instructions. Installation usually takes just a few minutes.

    **Step 3: Create an Account**
    Sign up using your email address or another available login option. Verify your account if required.

    **Step 4: Complete the Setup**
    Choose your preferences, adjust settings, and allow any permissions needed for the best experience.

    **Step 5: Start Using Sesame**
    Explore its tools, ask questions, complete tasks, and discover features designed to make your work and learning easier. Take your time to learn the interface and experiment with different options.

    **Why Use Sesame?**
    Easy to use
    Beginner-friendly interface
    Helps improve productivity
    Great for learning and everyday tasks
    Modern AI-powered experience

    **Tips for New Users**
    Keep the app updated for the latest improvements.
    Explore tutorials and help sections.
    Practice using different features regularly.
    Stay safe by using only official downloads.

    Learning a new tool may seem challenging at first, but with a little practice, Sesame can become a valuable part of your daily routine. Keep exploring, stay curious, and enjoy discovering everything it has to offer!

    #Sesame #AI #ArtificialIntelligence #Technology #Learning #DigitalSkills #TechTips #Productivity #Innovation #Software #BeginnerGuide #DownloadGuide #HowTo #Education #OnlineLearning #SmartTools #FutureTech #DigitalLearning #AICommunity #TechEducation
    #rsisb Roll NO.247 Foundation Level # 📥 How to Download and Use Sesame – A Complete Beginner's Guide 🌟 Are you looking for a simple way to get started with **Sesame**? 🤔 Whether you're exploring it for learning, productivity, or AI-powered conversations, this guide will help you understand the basics of downloading, setting up, and using Sesame with ease. 🚀 **Step 1: Download Sesame** Visit the official Sesame website or your device's app store. Make sure you download the official version to ensure security and access to the latest features. 📲 **Step 2: Install the App** After downloading, open the installer or app and follow the on-screen instructions. Installation usually takes just a few minutes. 📝 **Step 3: Create an Account** Sign up using your email address or another available login option. Verify your account if required. ⚙️ **Step 4: Complete the Setup** Choose your preferences, adjust settings, and allow any permissions needed for the best experience. 💡 **Step 5: Start Using Sesame** Explore its tools, ask questions, complete tasks, and discover features designed to make your work and learning easier. Take your time to learn the interface and experiment with different options. 🌍 **Why Use Sesame?** ✨ Easy to use ✨ Beginner-friendly interface ✨ Helps improve productivity ✨ Great for learning and everyday tasks ✨ Modern AI-powered experience 🎯 **Tips for New Users** ✅ Keep the app updated for the latest improvements. ✅ Explore tutorials and help sections. ✅ Practice using different features regularly. ✅ Stay safe by using only official downloads. Learning a new tool may seem challenging at first, but with a little practice, Sesame can become a valuable part of your daily routine. Keep exploring, stay curious, and enjoy discovering everything it has to offer! 🌟 #Sesame #AI #ArtificialIntelligence #Technology #Learning #DigitalSkills #TechTips #Productivity #Innovation #Software #BeginnerGuide #DownloadGuide #HowTo #Education #OnlineLearning #SmartTools #FutureTech #DigitalLearning #AICommunity #TechEducation
    0 Commentaires 0 Parts 1348 Vue
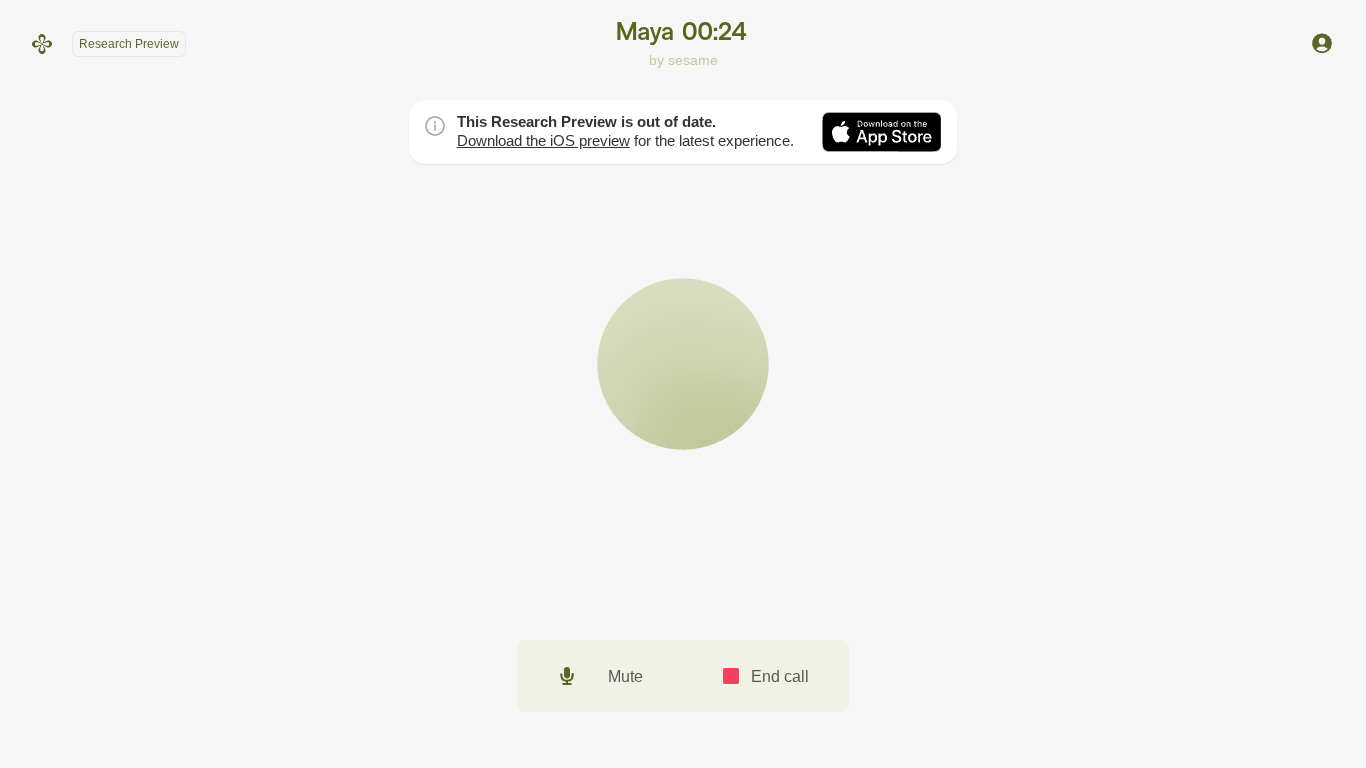
  • Today I had an insightful conversation with **Sesame AI** on the topic **“Comparing Various Political Structures and Their Effectiveness.”**

    In this discussion, we explored different political systems such as democracy, monarchy, federal and unitary structures, and how each system works in governing a country. The conversation helped us understand how leadership, citizen participation, accountability, and decision-making influence the effectiveness of a political system.

    It was a great learning experience that deepened my understanding of global political structures and how they shape societies and governance around the world.

    MAYA:23
    ROLL:71
    @highlight
    Rubab EducationWali
    Today I had an insightful conversation with **Sesame AI** on the topic **“Comparing Various Political Structures and Their Effectiveness.”** 🏛️🌍 In this discussion, we explored different political systems such as democracy, monarchy, federal and unitary structures, and how each system works in governing a country. The conversation helped us understand how leadership, citizen participation, accountability, and decision-making influence the effectiveness of a political system. It was a great learning experience that deepened my understanding of global political structures and how they shape societies and governance around the world. 📚✨ MAYA:23 ROLL:71 @highlight Rubab EducationWali
    0 Commentaires 0 Parts 357 Vue 0
  • RSLC # ROLL NO 85#
    FOUNDATION LEVEL Batch 06#
    DAY: 8#
    Task: 8#


    How to Download and Use Sesame?


    Want to Download and Use Sesame? dont worry in today's post I will explain how to Download and Use Sesame, So first Download Sesame from App Store or Google Play Sign up or log in Start interacting for questions, English practice, and conversations Use voice chats and tools inside app Save or share progress, There you go now you can have conversation's with Miles or Maya.

    Thank you!!!
    RSLC # ROLL NO 85# FOUNDATION LEVEL Batch 06# DAY: 8# Task: 8# How to Download and Use Sesame? Want to Download and Use Sesame? dont worry in today's post I will explain how to Download and Use Sesame, So first Download Sesame from App Store or Google Play Sign up or log in Start interacting for questions, English practice, and conversations Use voice chats and tools inside app Save or share progress, There you go now you can have conversation's with Miles or Maya. Thank you!!!
    0 Commentaires 0 Parts 431 Vue
  • Hope to do agreement with Sesame Street tomorrow for RehanSchool
    Hope to do agreement with Sesame Street tomorrow for RehanSchool
    0 Commentaires 0 Parts 265 Vue
  • The Navel
    Did you know why to put different oils in and on the belly button?

    Our Navel (Nabhi), is an amazing gift that our Creator has given us. According to science, the first part created after conception is the navel. After it is created, it joins the mothers placenta through the umbilical cord.

    Our Navel is surely an amazing thing! All our veins are connected to our navel, which makes it the focal point of our body. The belly button is life itself!

    The "Pechoti" is behind the navel, which has more than 72,000 veins. The total amount of blood vessels we have in our body is equal to double the circumference of the earth.

    We knew that to lower the temperature to the babies, we put a cotton swab with alcohol in the navel, now we know that with oil, its better.

    Applying oil in the navel heals the dryness of the eyes, poor view, the pancreas, the heels, and chapped lips, keeps the face bright, the hair healthier, for knee pain, the chills, lethargy, pain in the joints and dry skin.

    . Apply Neem Oil in your belly button - to get rid of stubborn pimples and acne

    . Apply Almond Oil in your belly button- to help achieve a glowing face

    . Apply Mustard Oil in your belly button - to get rid of dry, chapped lips. Will also keep your intestines moving to remove harmful bacteria but keep the good. Actually works as a mild detox.

    . Apply olive oil or coconut oil - to improve your fertility

    Keep alcohol dipped cotton on your belly button - to cure a cold, flu and a running nose. When a baby has stomach pain, we put a few drops directly in the navel and we give the massage around the naval a few minutes, the pain is cured. Oil works the same way.

    Keep brandy-soaked cotton ball on your belly button - to ease menstrual pain and cramps

    Sesame Oil is used for all types of joint pains. It is also known to strengthen bones. Many parents use in their children every night at bedtime.

    Use an equal amount of Mustard Oil And Ginger Oil For Upset Stomach, Bloating, Nausea and digestive problems.

    Using Warm Ghee improves blood flow to the nervous system and also enhances the immunity system. It cures constipation and builds a strong digestive system. It gives relief from joint pain.

    Thyme oil is anti-spasmodic, it helps relax your arteries and veins, lowering blood pressure and stress to your heart. It may also help strengthen and tone your heart muscles.

    As a diuretic, Thyme oil may help your body to remove excess water, salt and toxins from your body, helping with weight, blood pressure, digestion, and more.

    Thyme oil is an expectorant, which means it can help remove mucus from your airways and lungs. Thyme oil is approved by Germany’s Commission E in the treatment of bronchitis, whooping cough, and upper respiratory inflammation.

    Remember Thyme oil is a powerful compound and should not be used directly on your skin, as this can cause sensitization and irritation. It must first be diluted with a carrier oil (like olive oil, coconut oil, or almond oil)
    Thymus Vulgaris) Essential Oil 100% Pure Therapeutic Grade is what you look for.

    * FOR KNEE PAIN *
    At night before bed, put 3 drops of Castor oil in your navel and spread it 1 and a half inches around your navel.

    * FOR TREMORS AND LETHARGY, PAIN RELIEF IN YOUR JOINTS AND DRY SKIN

    At night before bed, put 3 drops of mustard oil in your navel and spread it 1 and a half inches around your navel.

    WHY PUT OIL IN AND AROUND YOUR BELLY BUTTON?
    Your Navel can detect which veins have dried up and by putting oil, those nerves open them...

    You can keep a small drip jar with the oil required next to your bed and place a few drops in your navel before going to sleep. This will make it convenient to pour and avoid accidental spills.

    I shared this valuable and very useful information to you all ... forwarded as received ! Please do your own research


    Really fascinating.. this info is on Google too.

    I
    The Navel Did you know why to put different oils in and on the belly button? Our Navel (Nabhi), is an amazing gift that our Creator has given us. According to science, the first part created after conception is the navel. After it is created, it joins the mother's placenta through the umbilical cord. Our Navel is surely an amazing thing! All our veins are connected to our navel, which makes it the focal point of our body. The belly button is life itself! The "Pechoti" is behind the navel, which has more than 72,000 veins. The total amount of blood vessels we have in our body is equal to double the circumference of the earth. We knew that to lower the temperature to the babies, we put a cotton swab with alcohol in the navel, now we know that with oil, it's better. Applying oil in the navel heals the dryness of the eyes, poor view, the pancreas, the heels, and chapped lips, keeps the face bright, the hair healthier, for knee pain, the chills, lethargy, pain in the joints and dry skin. . Apply Neem Oil in your belly button - to get rid of stubborn pimples and acne . Apply Almond Oil in your belly button- to help achieve a glowing face . Apply Mustard Oil in your belly button - to get rid of dry, chapped lips. Will also keep your intestines moving to remove harmful bacteria but keep the good. Actually works as a mild detox. . Apply olive oil or coconut oil - to improve your fertility Keep alcohol dipped cotton on your belly button - to cure a cold, flu and a running nose. When a baby has stomach pain, we put a few drops directly in the navel and we give the massage around the naval a few minutes, the pain is cured. Oil works the same way. Keep brandy-soaked cotton ball on your belly button - to ease menstrual pain and cramps Sesame Oil is used for all types of joint pains. It is also known to strengthen bones. Many parents use in their children every night at bedtime. Use an equal amount of Mustard Oil And Ginger Oil For Upset Stomach, Bloating, Nausea and digestive problems. Using Warm Ghee improves blood flow to the nervous system and also enhances the immunity system. It cures constipation and builds a strong digestive system. It gives relief from joint pain. Thyme oil is anti-spasmodic, it helps relax your arteries and veins, lowering blood pressure and stress to your heart. It may also help strengthen and tone your heart muscles. As a diuretic, Thyme oil may help your body to remove excess water, salt and toxins from your body, helping with weight, blood pressure, digestion, and more. Thyme oil is an expectorant, which means it can help remove mucus from your airways and lungs. Thyme oil is approved by Germany’s Commission E in the treatment of bronchitis, whooping cough, and upper respiratory inflammation. Remember Thyme oil is a powerful compound and should not be used directly on your skin, as this can cause sensitization and irritation. It must first be diluted with a carrier oil (like olive oil, coconut oil, or almond oil) Thymus Vulgaris) Essential Oil 100% Pure Therapeutic Grade is what you look for. * FOR KNEE PAIN * At night before bed, put 3 drops of Castor oil in your navel and spread it 1 and a half inches around your navel. * FOR TREMORS AND LETHARGY, PAIN RELIEF IN YOUR JOINTS AND DRY SKIN At night before bed, put 3 drops of mustard oil in your navel and spread it 1 and a half inches around your navel. WHY PUT OIL IN AND AROUND YOUR BELLY BUTTON? Your Navel can detect which veins have dried up and by putting oil, those nerves open them... You can keep a small drip jar with the oil required next to your bed and place a few drops in your navel before going to sleep. This will make it convenient to pour and avoid accidental spills. I shared this valuable and very useful information to you all ... forwarded as received ! Please do your own research 💙🧡 Really fascinating.. this info is on Google too. I
    0 Commentaires 0 Parts 478 Vue
  • Here is a recipe for Big Mac Briyani:

    Ingredients:
    - 1 lb ground beef
    - 2 onions, sliced
    - 1 cup basmati rice
    - 1 tsp salt
    - 1 tsp garam masala
    - 1 tsp cumin
    - 1 tsp coriander
    - 1 tsp turmeric
    - 1 tsp paprika
    - 2 tbsp ghee
    - 1 cup water
    - 1 large tomato, sliced
    - 1 large lettuce, shredded
    - 1 cup shredded cheddar cheese
    - 4 sesame seed buns, split and toasted
    - Burger sauce (tartar sauce)
    - 4 slices of American cheese

    Instructions:
    1. In a large skillet, cook the ground beef over medium heat until browned, about 10 minutes. Drain any excess fat and set aside.

    2. In another large skillet, heat the ghee over medium heat. Add the sliced onions and cook until softened and golden, about 5 minutes.

    3. Add the basmati rice, salt, garam masala, cumin, coriander, turmeric, and paprika to the skillet with the onions. Stir to combine.

    4. Add the water to the skillet and bring to a boil. Reduce heat to low, cover, and let simmer until the water is absorbed and the rice is cooked, about 20 minutes.

    5. Preheat your oven to 375°F (190°C).

    6. In a large baking dish, layer the cooked ground beef, cooked rice, sliced tomato, shredded lettuce, and shredded cheddar cheese. Repeat the layers until you have used all of the ingredients.

    7. Top the final layer of cheese with the toasted sesame seed buns.

    8. Bake in the oven for 15 minutes, or until the cheese is melted and bubbly.

    9. Serve the Big Mac Briyani hot, topped with a generous amount of burger sauce (tartar sauce) and a slice of American cheese on each bun.

    Enjoy your Big Mac Briyani! This unique dish combines the flavors of a classic Big Mac with the spices and textures of a traditional briyani.
    Here is a recipe for Big Mac Briyani: Ingredients: - 1 lb ground beef - 2 onions, sliced - 1 cup basmati rice - 1 tsp salt - 1 tsp garam masala - 1 tsp cumin - 1 tsp coriander - 1 tsp turmeric - 1 tsp paprika - 2 tbsp ghee - 1 cup water - 1 large tomato, sliced - 1 large lettuce, shredded - 1 cup shredded cheddar cheese - 4 sesame seed buns, split and toasted - Burger sauce (tartar sauce) - 4 slices of American cheese Instructions: 1. In a large skillet, cook the ground beef over medium heat until browned, about 10 minutes. Drain any excess fat and set aside. 2. In another large skillet, heat the ghee over medium heat. Add the sliced onions and cook until softened and golden, about 5 minutes. 3. Add the basmati rice, salt, garam masala, cumin, coriander, turmeric, and paprika to the skillet with the onions. Stir to combine. 4. Add the water to the skillet and bring to a boil. Reduce heat to low, cover, and let simmer until the water is absorbed and the rice is cooked, about 20 minutes. 5. Preheat your oven to 375°F (190°C). 6. In a large baking dish, layer the cooked ground beef, cooked rice, sliced tomato, shredded lettuce, and shredded cheddar cheese. Repeat the layers until you have used all of the ingredients. 7. Top the final layer of cheese with the toasted sesame seed buns. 8. Bake in the oven for 15 minutes, or until the cheese is melted and bubbly. 9. Serve the Big Mac Briyani hot, topped with a generous amount of burger sauce (tartar sauce) and a slice of American cheese on each bun. Enjoy your Big Mac Briyani! This unique dish combines the flavors of a classic Big Mac with the spices and textures of a traditional briyani.
    0 Commentaires 0 Parts 197 Vue
  • The image shows a bottle of Lee Kum Kee Chili Oil. To make a similar chili oil at home, youll need to prepare a flavorful oil infused with heat from chilies. Heres a simple recipe you can try:

    ### Homemade Chili Oil

    **Ingredients:**
    - 1 cup of a neutral oil (like vegetable, canola, or peanut oil)
    - 1/2 cup of dried chili flakes (adjust more or less depending on your heat preference)
    - 2 tablespoons of sesame seeds (optional)
    - 2 cloves of garlic, minced (optional)
    - 1 inch of ginger, minced (optional)
    - 1 teaspoon of Sichuan peppercorns (optional for a numbing effect)

    **Instructions:**
    1. Heat the oil in a saucepan over medium heat. If youre using garlic, ginger, or sesame seeds, add them to the oil and gently fry until aromatic, but be careful not to burn them.
    2. In a heatproof bowl, place the dried chili flakes and Sichuan peppercorns.
    3. Once the oil is hot (around 225-250°F, or when a test spice begins to sizzle), carefully pour it over the chili flakes and peppercorns in the bowl. It should sizzle upon contact.
    4. Stir the mixture to ensure the heat distributes evenly through the chili flakes.
    5. Allow the oil to cool completely in the bowl. The chili flakes will settle at the bottom and the oil will become a bright red color.
    6. Once cooled, strain the oil through a fine-mesh sieve if you prefer a clear oil, or leave the flakes in for a more textured oil.
    7. Transfer the oil to a sterilized bottle or jar and store it in a cool, dark place.

    Remember, the longer the oil sits, the more flavorful it will become as the chilies infuse their heat and flavor into the oil. Always use a clean spoon to avoid contamination when using your homemade chili oil. Enjoy your homemade chili oil as a condiment or cooking ingredient!
    The image shows a bottle of Lee Kum Kee Chili Oil. To make a similar chili oil at home, you'll need to prepare a flavorful oil infused with heat from chilies. Here's a simple recipe you can try: ### Homemade Chili Oil **Ingredients:** - 1 cup of a neutral oil (like vegetable, canola, or peanut oil) - 1/2 cup of dried chili flakes (adjust more or less depending on your heat preference) - 2 tablespoons of sesame seeds (optional) - 2 cloves of garlic, minced (optional) - 1 inch of ginger, minced (optional) - 1 teaspoon of Sichuan peppercorns (optional for a numbing effect) **Instructions:** 1. Heat the oil in a saucepan over medium heat. If you're using garlic, ginger, or sesame seeds, add them to the oil and gently fry until aromatic, but be careful not to burn them. 2. In a heatproof bowl, place the dried chili flakes and Sichuan peppercorns. 3. Once the oil is hot (around 225-250°F, or when a test spice begins to sizzle), carefully pour it over the chili flakes and peppercorns in the bowl. It should sizzle upon contact. 4. Stir the mixture to ensure the heat distributes evenly through the chili flakes. 5. Allow the oil to cool completely in the bowl. The chili flakes will settle at the bottom and the oil will become a bright red color. 6. Once cooled, strain the oil through a fine-mesh sieve if you prefer a clear oil, or leave the flakes in for a more textured oil. 7. Transfer the oil to a sterilized bottle or jar and store it in a cool, dark place. Remember, the longer the oil sits, the more flavorful it will become as the chilies infuse their heat and flavor into the oil. Always use a clean spoon to avoid contamination when using your homemade chili oil. Enjoy your homemade chili oil as a condiment or cooking ingredient!
    0 Commentaires 0 Parts 197 Vue
  • here’s a quick and authentic recipe for the Chinese-style smashed cucumber salad you just showed me:


    Smashed Cucumber Salad (Pai Huang Gua)

    Ingredients (2–3 servings)
    • 2 large cucumbers (or 4–5 small ones)
    • 3–4 garlic cloves (finely chopped or minced)
    • 1–2 tbsp soy sauce
    • 1 tbsp rice vinegar (or white vinegar if not available)
    • 1 tsp sesame oil
    • 1–2 tsp chili oil (adjust to taste)
    • ½ tsp sugar (optional, balances flavor)
    • A pinch of salt
    • Fresh cilantro or spring onions for garnish
    • Crushed peanuts (optional, for crunch)


    Instructions
    1. Smash cucumbers – Place cucumbers on a cutting board, cover with the flat side of a large knife, and smash gently until they crack. Cut into bite-sized chunks.
    2. Drain water – Lightly salt the cucumber pieces and let them sit 5–10 minutes. Drain excess water to keep salad crunchy.
    3. Make dressing – In a small bowl, mix soy sauce, vinegar, sesame oil, chili oil, garlic, and sugar.
    4. Mix together – Toss cucumbers with the dressing. Add cilantro or spring onion.
    5. Serve – Top with crushed peanuts if you like. Enjoy cold or at room temperature.


    Tip: It tastes even better if you chill it in the fridge for 15 minutes before serving.
    🌿 here’s a quick and authentic recipe for the Chinese-style smashed cucumber salad you just showed me: ⸻ 🥒 Smashed Cucumber Salad (Pai Huang Gua) Ingredients (2–3 servings) • 2 large cucumbers (or 4–5 small ones) • 3–4 garlic cloves (finely chopped or minced) • 1–2 tbsp soy sauce • 1 tbsp rice vinegar (or white vinegar if not available) • 1 tsp sesame oil • 1–2 tsp chili oil (adjust to taste) • ½ tsp sugar (optional, balances flavor) • A pinch of salt • Fresh cilantro or spring onions for garnish • Crushed peanuts (optional, for crunch) ⸻ Instructions 1. Smash cucumbers – Place cucumbers on a cutting board, cover with the flat side of a large knife, and smash gently until they crack. Cut into bite-sized chunks. 2. Drain water – Lightly salt the cucumber pieces and let them sit 5–10 minutes. Drain excess water to keep salad crunchy. 3. Make dressing – In a small bowl, mix soy sauce, vinegar, sesame oil, chili oil, garlic, and sugar. 4. Mix together – Toss cucumbers with the dressing. Add cilantro or spring onion. 5. Serve – Top with crushed peanuts if you like. Enjoy cold or at room temperature. ⸻ ⚡ Tip: It tastes even better if you chill it in the fridge for 15 minutes before serving.
    0 Commentaires 0 Parts 184 Vue
Plus de résultats